La nascita delle Orecchiette

Orecchiette

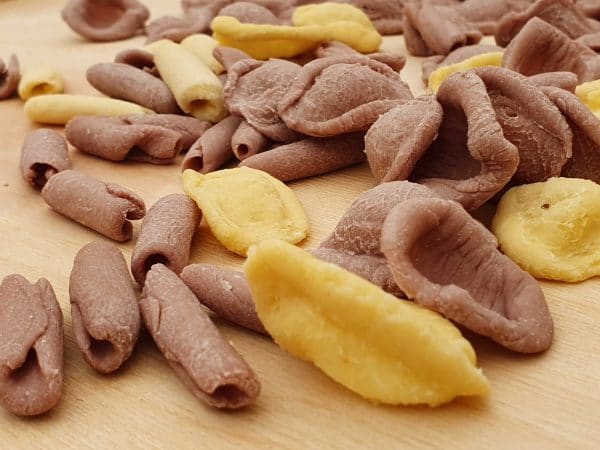
La nascita delle orecchiette è avvolta nel mistero. Il poeta latino Varrone parla delle lixulae, un tipo di pasta a forma rotonda con il centro concavo ottenuta con farina, acqua.

MEDIOEVO

Nel Medioevo, nella zona provenzale, si produceva una pasta simile alle orecchiette, le crosets. Con il grano duro si lavorava una pasta piuttosto spessa, che veniva tagliata in dischi dal diametro irregolare, incavati con la pressione del pollice al centro.

Alcune fonti attribuiscono alla Napoli duecentesca dei d’Angiò Conti di Provenza, il merito di diffondere la pasta provenzale con il nome di orecchietta. Essi avevano tra i loro domini anche le terre di Puglia.

DURANTE IL RINASCIMENTO

Si hanno notizie di questa pasta anche intorno alla seconda metà del 1500 da Giambattista del Tufo, scrittore napoletano le cui opere sono ricchissime di notizie storiche sugli usi e costumi dell’Italia meridionale. Per la prima volta le orecchiette venivano descritte come prodotto tipico di Bari.
Il nome da quel momento diventa “strascinate e maccheroni incavati di Bari”. Secondo la tradizione locale, la forma delle orecchiette sembra s’ispiri a quella dei tetti dei trulli.

Attorno alla fine del ’500, negli archivi della chiesa di San Nicola a Bari fu ritrovato un documento con il quale un padre donava il panificio alla figlia. Nell’atto notarile si poteva anche leggere che la cosa più importante lasciata in dote matrimoniale era l’abilità della figlia di preparare le recchietedde.

LA FARINA

La semola è l’ingrediente principale delle orecchiette. È una farina di grano duro, più granulosa e ricca di glutine. Talvolta viene utilizzata la semola integrale, più grezza. Per preparare le orecchiette, la semola va impastata con acqua tiepida, in un rapporto di circa 1/3 rispetto al peso della farina. Alcune versioni della ricetta prevedono anche l’aggiunta di un uovo che rende l’impasto più “calloso”.

La ricetta vuole così:

Prendi la semola, fai il camino, mettici al centro l’acqua opportunamente salata e impasta fino a quando la semola non assorbe tutta l’acqua. Qualcuno ci mette pure una o due uova per rendere le orecchiette più callose.

Dopo aver impastato, riunire la massa tutta insieme e, quando diventa liscia come il velluto, metterla da parte coperta da un piatto per non farla asciugare. Tagliarne un pezzo, impastarlo per bene e stenderlo con le mani finché non diventi un bastoncino lungo e sottile; più sottile è, e più piccole verrano le orecchiette.

Dopodiché prendere il coltello e cominciare l’opera. E qui sta il segreto perché è una questione di dita, di come si muovono fra impasto, coltello e piano. Col coltello raschiare avanti e dietro il piano per renderlo rasposo così da far venire la pasta rugosa e non liscia.

Prendere lo “sferre” con le due mani appoggiando sopra l’indice e il medio e sotto il pollice: tagliare un pezzo di mazza e tirare, facendo con i due indici un mezzo cerchio sopra il tocchetto così che l’orecchietta si rovesci direttamente sotto il coltello e non vada girata sul dito, come fanno quelle che non sono di Bari.

Man mano che si fanno, mettere le orecchiette ad asciugare al sole.

L’usanza vuole che le orecchiette per il ragù siano più piccole e preferibilmente secche, mentre quelle da fare con le cime di cavolo devono essere più grosse e fresche.

Lo “sferre” è un coltello senza manico e non zigrinato, utilizzato per trascinare i pezzettini d’impasto sul tavolo. “U’ tavelidd/tavelier” è invece un piano di legno su cui si lavora la pasta fresca. Più è usato e meglio funziona: infatti viene addirittura raschiato per conferire la tipica rugosità alle orecchiette.

Orecchiette e Predizione

Le orecchiette hanno persino proprietà divinatorie. Per prevedere il sesso del nascituro, la futura madre era solita mettere nell’acqua bollente una recchietedde ed un pezzo di maccherone grosso detto zito. Al forte bollore, questi andavano su e giù nella pentola: se la donna vedeva salire a galla prima la recchietedde pronosticava che sarebbe nata una femmina. Se invece vedeva salire prima lo zito, sarebbe nato un maschio.


Fonti:
Signorile Vito, Ce se mange iòsce? Madonne ce ccròsce! Le tradizioni
gastronomiche raccontate da un buongustaio
, Gelso Rosso, Bari, 2008.
Sbisà Nicola, Puglia in Tavola, Le ricette della tradizione, Adda, Bari, 2009.

Related articles:

>> The sauce

>> How to prepare “Orecchiette con braciole”

>> How to prepare “Orecchiette with breadcrumb”

>> How to prepare “Orecchiette con cime di rapa”

Il grano Senatore Cappelli

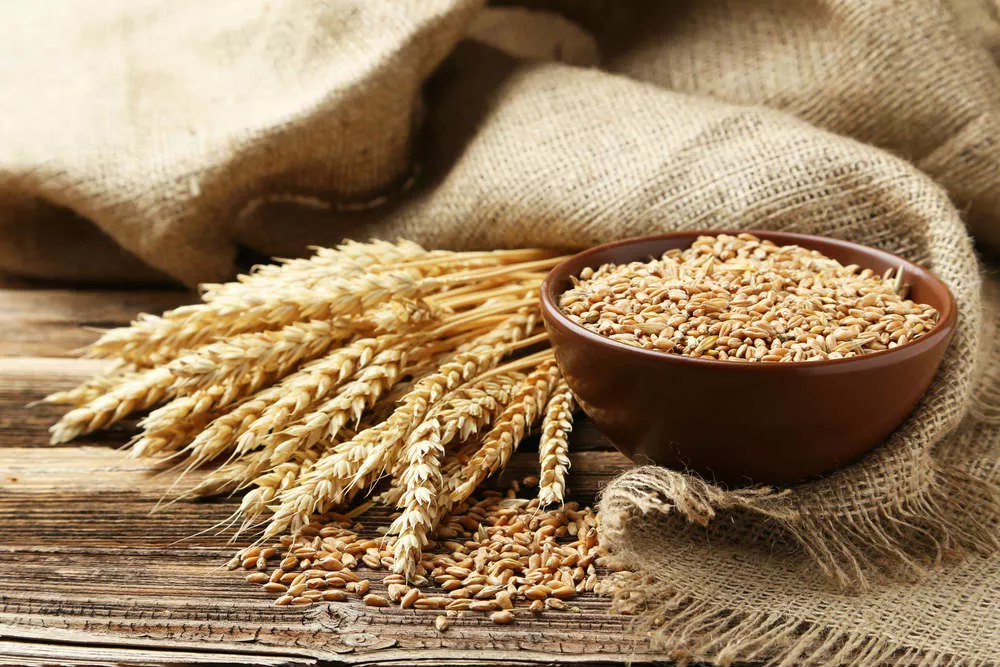
Quando, nel 1906, il marchese Raffaele Cappelli, proprietario di numerosi poderi in Capitanata, decise di adibire alla coltivazione sperimentale uno di essi, il ministro dell’agricoltura gli fece il nome di Nazareno Strampelli.

Raffaele Cappelli

Quest’ultimo era agronomo e genetista, da anni impegnato nell’ibridazione delle specie di frumento sulla scia delle teorie di Mendel. Strampelli accettò senza esitazione la proposta del marchese.

Nel cosiddetto Granaio d’Italia, furono concessi allo scienziato per i suoi esperimenti un appezzamento di terra piuttosto distante e uno sgabello. Ciò non placò affatto il suo zelo e la sua dedizione.

L’obiettivo di Strampelli era semplice: aumentare il ricavato dei raccolti. Ciò era possibile dando origine a delle varietà di frumento resistenti alle intemperie e alle siccità specifiche dei diversi climi. Senza dubbio un’intenzione nobile, se si considera che a quel tempo non erano in pochi a soffrire i morsi della fame. I primi grani che lo scienziato diffuse incontrarono forti resistenze, un po’ per una consuetudine radicata e un po’ per l’opposizione dei produttori di sementi.

Nazareno Strampelli con la moglie Carlotta

Il regime fascista mutò la situazione. Forte dell’incrollabile certezza dello scienziato, il Duce diede avvio alla Battaglia del grano, passo decisivo per il generale progetto autarchico.

Mussolini in persona fece visita a Strampelli per valutare la portata delle sue scoperte. All’epoca l’Italia importava buona parte del grano dagli Stati Uniti e dall’Unione Sovietica.

Nella foto: Il re Vittorio Emanuele III, Mussolini e Strampelli in visita presso un campo sperimentale

Lionetto Cappiello, manifesto di propaganda per la Battaglia del grano, 1926

In meno di sei anni la battaglia fu vinta: per quanto riguardava il grano, l’Italia poteva dirsi indipendente. L’impiego massiccio delle “sementi elette” fu uno dei fattori principali della vittoria. Il regime omaggiò abbondantemente Strampelli, nominandolo addirittura senatore. Ma l’agronomo, poco interessato alla politica, scrisse una lettera a Mussolini declinando l’offerta. La richiesta fu respinta e, malgrado la carica fosse stata ufficializzata, Strampelli continuò a dedicarsi assiduamente ai suoi studi.

In poco tempo le varietà di grano da lui sviluppate si diffusero in tutto il mondo, giungendo persino a scatenare una battaglia del grano analoga, ma di segno opposto: quella della Cina maoista.

Strampelli non brevettò mai i frutti del suo studio, operazione che lo avrebbe reso ricchissimo, e rifiutò i privilegi derivati dagli alti meriti conferiti dallo Stato. Benché fosse consapevole del valore della sua opera, non si dilungò nemmeno in pubblicazioni prolisse e autocelebrative. A tal proposito affermava:

L’uomo che allarga ogni giorno il suo dominio su tutto ciò che lo circonda non è padrone del tempo, il grande galantuomo che tutto mette a posto. E il tempo a me è mancato di fare tante cose che pure avrei voluto veder compiute. Le mie pubblicazioni, quelle a cui tengo veramente, sono i miei grani. Non conta se essi non portano il mio nome; ma ad essi è e resta affidata la modesta opera mia.

Suo malgrado, è lecito considerare Strampelli un pioniere della Rivoluzione verde: quella rivoluzione che in pochi decenni ha portato alla perdita di biodiversità, ad un maggiore inquinamento e persino all’uso di OGM. Anche il suo nobile scopo è stato messo da parte: oggi le multinazionali detengono i brevetti delle nuove specie rendendole spesso sterili per costringere gli agricoltori al rifornimento continuo e alla dipendenza. Certamente lo scienziato si sarebbe opposto con fermezza.

In nome della produttività le sementi di Strampelli sono state a loro volta sostituite. Egli ne sviluppò più di sessanta, dando ad ogni varietà un nome diverso: Carlotta, in onore della moglie che fu anche sua fedele assistente, Gregorio Mendel, Dante e ancora Stamura, Apulia, Alalà…
L’agronomo non dimenticò nemmeno il marchese, diventato nel frattempo anch’egli senatore, che anni prima gli aveva affidato un campo. Nacque così il grano “Senatore Cappelli” che divenne allora uno dei più diffusi, ma al giorno d’oggi, coltivato ormai in poche regioni d’Italia, si può ritenere una specie rara e pregiata.

Nazareno Strampelli

Fonti:
“Una campagna propagandistica del regime fascista: la battaglia del grano”.
“Nazzareno Strampelli e la battaglia del grano”.
“Museo della Scienza del Grano ‘Nazareno Strampelli’”.
“Nazareno Strampelli”.
“Il grano del Senatore”, TG2 Dossier, RAI.
“Nazareno Strampelli”, Wikipedia.
Oriana Porfiri, “Nazareno Strampelli. Il mago del grano”.
Dario Bressanini, “Il Senatore Cappelli e gli altri grani di Nazareno Strampelli”, Le Scienze.

Related articles:

>>The sauce (coming soon…)

>> How to prepare “Orecchiette con braciole”

>> How to prepare “Orecchiette with breadcrumb”(coming soon…)

>> How to prepare “Orecchiette con cime di rapa”(coming soon…)

Apulian Menù. The Orecchiette with brasciole

The Orecchiette con brasciole is a real classical menu in Puglia. It’s very common to smell this particular meat sauce on Sundays along the streets of our neighbor towns, prepared with the traditional hand-made orecchiette by our mothers’ and gradmothers’ hands.

Let’s start to prepare this typical Apulian menù.

Look here for vegetarian solutions>>>

What you need

A basic ingredient, the meat. In Puglia is usual to choose among three different kind of meat: veal, pork and horse. During our classes we use exclusively veal. Ask to the butcher for a compact piece of meat (the thigh) with a thickness of 2/3 mm.

  • Meat (1 piece for each person or more)
  • the 4 ingredients (see below) for stuffing
  • additional garlic or onion
  • toothpicks
  • pan with high edge
  • sauce (1 lt. for 4 persons) – I suggest to prefer “Mutti” sauce, a nice sweet sauce, here the link to website>>>
  • red or white wine (we prefer Primitivo, Negramaro, or a full-bodied and scented white wine)
  • salt

The four ingredients (stuffing)

  • garlic or onion
  • parcely or celery
  • pecorino cheese (minimun 6 months aged)
  • hot chili pepper (discard it if you din’t like chili)
  • Let be clear about the quantity of ingredients. Somewhere there’s a recipe with a clear indications of grams and liters but I’ve learned from my grand-mother the value of “un pò“, that’s to say “a little bit”, interpreted as a pinch or a palm or a full palm. So, I ever suggest to… follow your heart, your feelings and sometimes what you have into the fridge 😉

Procedure for meat stuffing

The cut of thigh can generate a large slice or a slender one. In this last case, extend the meat (it is elastic) with light pinches to the outside. Arrange it vertically lengthwise. In this way, it will be more comfortable rolling the slice.

Mince the four ingredients and put them in the middle of meat then overlap one side on the other. Roll it up, starting from the bottom. It should be tight so that the ingredients would not come out during cooking.

Close the meat with toothpicks crossing the slice.

The number of toothpicks can variate and we use them to distinguish the pieces of meat in case of different ingredients.

Cooking the meat

The Italian way of cooking is usually adding the ingredients one at a time. Into a pan with high edge put some olive oil and some pieces of garlic (or onion, it depends on your preference) and let brown for a while. It should only assume a golden color and don’t let it burn. Use all the time a low heat.

Add the “brasciole” to the oil with garlic for few minutes, turning them frequently making them brown on all sides and not to burn (burning will make the meat hard). Add some red/white wine, whose quantity depends on your… feelings.

Remember: in the South we never follow receipe but we are guided by our emotions…..

Increase the heat and cook for few minutes to let the alcohol evaporate and when it lp to caramelizes, add the sauce. Decrease the heat and let cook for almost 2 hours adding “some” salt and occasionally water if you see that the sauce has reduced lot. Halfway through cooking add some basil leaves.

A secret: for the last addition of water: mix into the sauce one ladles of the cooking pasta water. The starch wll help to thicken the sauce.

Use the sauce to season the Orecchiette for the first course and eat the brasciole as a second course. Don’t forget the “scarpetta” with a good pugliese bread…

Buon appettito!

OUR “PASSATA”

Our sauce is made by using a specific tomato, the “San Marzano” variety, a long toamto with an intense flavorand a particularly firm and pulpy texture. It was tipical of the town of San Marzano near Taranto, Sava and Manduria, the same area in which the Primitivo wine is produces with its intense and strong taste.


Related articles:

>>The sauce (coming soon)

>> How to prepare “Orecchiette con cime di rapa” (coming soon)

>> How to prepare “Orecchiette with breadcrumb” (coming soon)

Practical lesson 1 – The Orecchietta

Guide to Production of Apulian Orecchietta

We had the pleasure of hosting you and handing down the tradition of Salento and the “Pugliese” art of our famous handmade pasta: the Orecchiette, a knowledge that you’ll bring with you and maybe you will reproduce at home with your friends and relatives.

For this reason, we have created this mini-guide that summarizes the salient aspects of the production, that you experimented with your hands.

Let’s begin with the main aspect: the aesthetic color of the “orecchietta” (singular) is of that intense yellow, typical of the special durum wheat flour, called Semolina flour, result of mix of the three different local grains: semito, quadrato and Senatore Cappelli. The last one is a very ancient local grain, now revalueted that has the characteristic of producing 50% less gluten, being in this way more healthy.

Orecchiette

Very important is the porosity of pasta that in the hand-made version is much more evident and marked. The form: they have the grace to be each little bit different from the others. We believe that their perfection consists in their imperfection: real pieces of art that also testify the love of whom  produce them.

Not as final point is that unique taste due to the mix of wheats of our land of Puglia and the passion of our our grandmothers and mothers, who with their marvelous manual skill are able to give life to these real masterpieces.

An explosion of smells and colors and a mix of emotions, between flying flour and the scent of traditions. Authentic emotions that we love to share with you!


And now let’s move to practice with the ingredients and the procedure to make homemade Pugliese orecchiette.

Orecchiette

The Ingredients X 4 persons:

A pastry board, a serrated knife, 500 gr. durum wheat flour (at the end of the article you’ll find a list of Apulian semola flour you can buy on internet); 1 dl of lukewarm water. Don’t forget the ingredients of love, passion and a lot of patience.

The Procedure:

– pour the durum wheat flour on the pastry board, create a fountain with it and a large hole in it (as the mouth of a vulcano) add the water little bit of water and cover it completely. Mix it from below. Continue to procedure (create the fountain and the vulcano, a large hole, add water, cover and mix it) till all flour is mixed and after start kneading it.

Remember the influence of the wind so that you have to measure the quantity of water depending on the wind and the humidity of the day;

– work the dough for about ten minutes, using the lower part of the palm of your hand to press and drag the dough on the pastryboard, and continue until inside you’ll see  tiny bubbles: you should get a rather firm and smooth dough. If the dough results too hard, add some water; if instead it results to be too soft, add more flour until obtaining a good consistency. Always keep the flour close to your hands to be poured in small dices on the pastry board if necessary to allow the dough to slide well. A secret: moisten your hands a little to prevent the mixture sticking to the hands.

– once you have finished kneading, cover the dough with a damp cloth to prevent it from drying out; start immediately by cutting a piece of dough and roll it under your hands on the floured surface of the pastry board until you’ll get a long snake that you’ll put on the upper part of the pastryboard;

Cut from the snake a small piece, more or less one centimeter long (it is indicative. You can use more pasta and get bigger orecchiette.) Experiment at this step for new experiences :-);

– with the rounded tip of the knife and with a not very strong but firm pressure, drag on the pastry board the piece so that the dough, curving, becomes similar to a shell. The knife accompanying the pasta will produce those typical striations of the orecchietta.

– without removing the dough from the knife but helping with it, place each shell on the tip of the thumb and reverse it backwards using the middle finger and the forefinger. At this point the knife helps you only not to loose the piece;

Remember to be gentle with the dough and to measure the pressure to put not to cut it.

– the final result will be the orecchietta which you will arrange next to each other, without keeping in touch with concave shape up not to become flat;

Remember: the correct position of the thumb will give the concave shape, so important because it collects the sauce that will contribute to a fantastic taste!

– continue until you have finished all the dough. The advice is to prepare this wonder pasta t early in the morning to let them slightly dry. You can also keep for few days and will be more callous when cooked. If you want to conserve the pasta longer, after they’re completely dried, you can put into the freezer.

Once these little “jewels” have been created, it’s finally time to cook them; and respecting our tradition which dish could we recommend? Yes, we cook the famous orecchiette with turnip greens, or with fresh tomatoes and basil, or with the addition of anchovies preparing them in a sauce of bread crumbs made toasted in extra virgin olive oil, another wonder of our tradition.

Buon appetito!


Related articles:

Accetta e Prosegui...
Questo sito utilizza cookie che ci aiutano a fornire i nostri servizi. Facendo click sul link di accettazione acconsenti ad utilizzare i cookie e potrai continuare a navigare nel sito. LEGGI INFORMATIVA